
Are you an aspiring artist looking to unleash your creativity on the digital canvas? Look no further than the iPad, a powerful tool that has revolutionized the art of sketching.
In this article, we will explore the top 10 techniques that will help you master the art of sketching on iPad. From choosing the right sketching app to understanding layers and brushes, we will delve into the intricacies of creating stunning artwork with precision and expertise.
Get ready to elevate your artistic skills and unlock the freedom of digital sketching.
Choosing the Right Sketching App
When choosing the right sketching app, it is important to consider the features and functionality that will best suit your artistic needs.
In today's digital age, sketching on an iPad offers numerous advantages over traditional sketching methods. The iPad provides a convenient and portable platform for artists to express their creativity on the go.
With the use of a stylus or Apple Pencil, the iPad allows for precise and detailed sketching, giving artists more control and freedom in their work.
Additionally, digital sketching offers the ability to easily undo or erase mistakes, making the creative process more forgiving and efficient.
The iPad also provides a wide range of drawing tools, brushes, and color options, further expanding artistic possibilities.
Understanding Layers and Brushes
Efficiently understanding the functionality of layers and brushes is crucial for mastering the art of sketching on iPad. Layers allow artists to work on different elements of their artwork separately, making it easier to make changes and adjustments. They provide the freedom to experiment with different effects, opacity, and transparency levels.
By understanding opacity and transparency, artists can create depth and dimension in their sketches. They can play with different levels of transparency to create highlights, shadows, and textures. Exploring different brush textures further enhances the creative possibilities. Artists can choose from a wide range of brush textures, such as smooth, textured, or even simulate the effect of traditional art mediums like pencil or watercolor.
Understanding the potential of layers and brushes on the iPad unlocks endless opportunities for artistic expression and freedom.
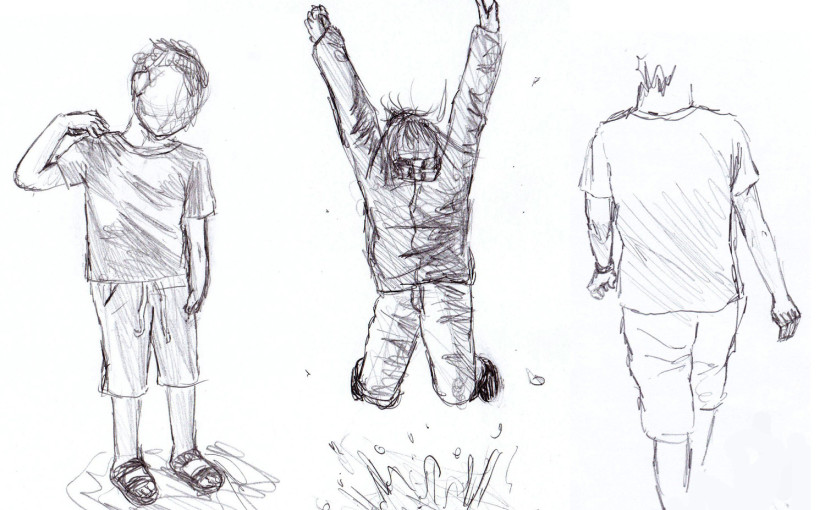
Mastering Proportions and Perspective
Achieving accurate proportions and perspective is essential for creating realistic and visually appealing sketches on the iPad. To master scale and proportion, it is important to understand the concept of vanishing points and horizon lines.
Vanishing points are points in the distance where parallel lines appear to converge, creating the illusion of depth. By placing objects along these lines, artists can create a sense of perspective and depth in their sketches.
The horizon line, on the other hand, represents the viewer's eye level and helps determine the height and position of objects in relation to the viewer.
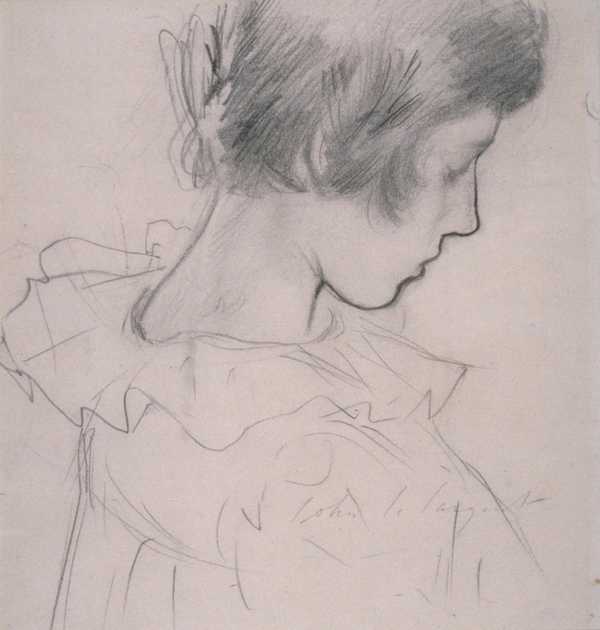
Using Reference Images for Inspiration
Using reference images for inspiration is a crucial technique that can greatly enhance creative visualization in iPad sketching. By studying and analyzing reference images, artists can improve their understanding of composition and perspective, resulting in more accurate and visually appealing sketches.
Additionally, reference images can spark new artistic ideas and provide a starting point for creating unique and original artwork.
Enhancing Creative Visualization
Utilizing reference images as a source of inspiration greatly enhances the creative visualization process when sketching on iPad. When engaging in creative brainstorming, having access to a wide range of reference images can help spark new ideas and push the boundaries of your imagination.
Whether you are looking to explore different sketching techniques or simply seeking inspiration for a specific subject, reference images provide a valuable resource for artists. By studying and analyzing these images, you can gain a deeper understanding of form, composition, and color, and apply these insights to your own sketches.
Furthermore, reference images can serve as a starting point, allowing you to experiment and develop your unique style. With the freedom to explore and draw from various references, the possibilities for creative visualization on the iPad are limitless.
Improving Composition and Perspective
Developing a strong sense of composition and perspective, while drawing inspiration from reference images, is crucial for creating visually captivating sketches on the iPad. To improve composition techniques, it is essential to understand the arrangement of elements within the frame. This involves considering the rule of thirds, leading lines, and balancing the visual weight of different objects. By strategically placing objects and using negative space, artists can create a harmonious and visually pleasing composition.
Mastering perspective skills is equally important for creating realistic and dynamic sketches. Understanding the principles of one-point, two-point, and three-point perspective allows artists to accurately portray depth and dimension. This skill enables the creation of drawings that have a sense of realism and believability.
To enhance composition and perspective, utilizing reference images can be highly beneficial. Reference images provide inspiration and help artists understand how different elements interact in real life. They can serve as a guide for proportions, angles, and overall visual balance. By studying and analyzing reference images, artists can incorporate these elements into their sketches, resulting in more accurate and visually appealing artwork.
Sparking New Artistic Ideas
Regularly exploring reference images can ignite fresh artistic ideas and stimulate creativity for sketching on the iPad. Here are four ways to use reference images for sparking creativity and finding inspiration:
Research different art styles:
By studying the works of different artists and art movements, you can gain a deeper understanding of various techniques and styles. This exploration can help you develop your own unique artistic voice.
Experiment with different subjects:
Reference images can introduce you to new subjects and themes that you may not have considered before. Whether it's landscapes, portraits, or still life, exploring different subjects can expand your creative horizons.
Combine elements from multiple images:
Don't be afraid to mix and match reference images to create something entirely new. This can lead to innovative and unexpected compositions that reflect your personal style.
Use images as a starting point:
Rather than trying to replicate a reference image exactly, use it as a jumping-off point for your own interpretation. Let your imagination run wild and add your own artistic flair to create something truly unique.
Regularly exploring reference images can provide a wealth of inspiration and ideas for your iPad sketches, helping you to continuously grow and explore new artistic territories.
Exploring Different Pencil and Pen Styles
One of the essential aspects of sketching on iPad is understanding and experimenting with various pencil and pen styles. With the wide range of digital sketching tools available, artists have the freedom to choose from an array of realistic and imaginative styles to create their masterpieces.
Whether you prefer a classic pencil sketch, a bold ink drawing, or a vibrant marker effect, the iPad offers a multitude of options to suit your artistic vision. The ability to switch between different pencil and pen styles allows artists to explore new techniques and bring their ideas to life in unique and dynamic ways.
Utilizing Blending and Smudging Techniques
Implementing blending and smudging techniques can enhance the depth and realism of your digital sketches on iPad. These techniques allow you to seamlessly blend colors and textures, creating smooth transitions and adding dimension to your artwork.
Here are four ways you can make the most of blending and smudging techniques:
Layering colors: Apply multiple layers of colors and blend them together using gentle strokes. This technique creates a soft and blended effect, perfect for creating realistic shading.
Gradient blending: Use the blending tool to smoothly blend two or more colors together, creating a gradual transition from one color to another. This technique is great for creating smooth gradients and realistic lighting effects.
Texture blending: Experiment with different brushes and textures to create interesting effects. Use the smudging tool to blend and soften textures, giving your artwork a unique and expressive look.
Highlight and shadow blending: Use blending techniques to add highlights and shadows to your sketches. Blend lighter colors to create highlights and darker colors for shadows, creating depth and dimension in your artwork.
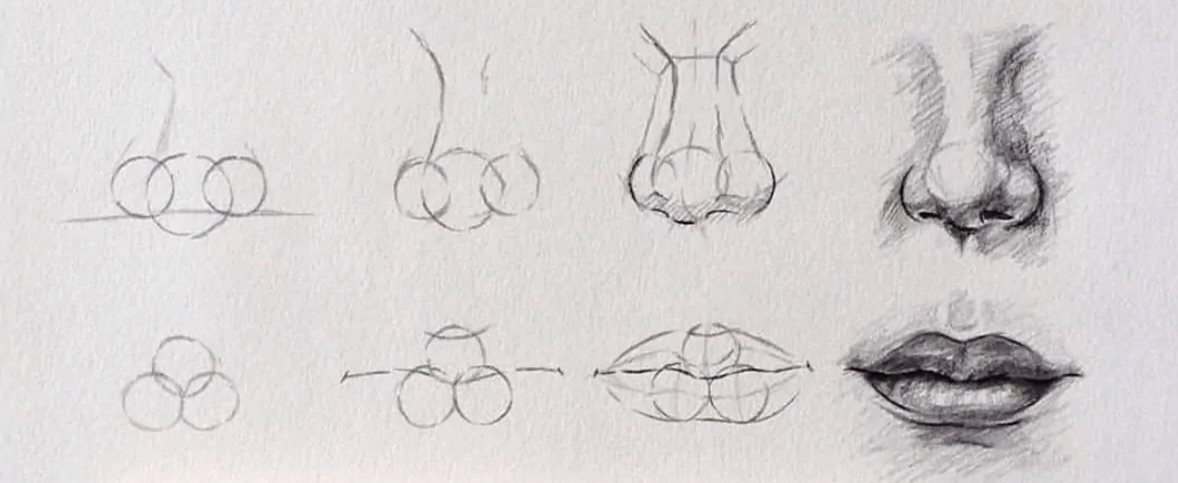
Creating Depth and Shadows With Layering
Creating depth and shadows through layering is a crucial technique for achieving realistic and three-dimensional artworks on the iPad.
By strategically adding layers and adjusting their opacity, artists can build up various tones and values to create the illusion of depth.
Layering also allows for the gradual application of shadows, enabling artists to enhance the sense of volume and dimension in their sketches.
With the right approach to layering, artists can bring their digital sketches to life with depth and realism.
Layering for Realistic Shadows
Achieving a lifelike effect in digital sketches is possible by skillfully layering various shades and tones to create depth and realistic shadows. Layering techniques for digital art allow artists to add dimension to their sketches, making them visually appealing and realistic.
Here are four effective techniques for creating realistic shadows through layering:
Build up layers gradually: Start with lighter shades and gradually add darker tones to create depth and volume in your sketch.
Use blending modes: Experiment with different blending modes to achieve the desired effect. Multiply and Overlay blending modes often work well for creating shadows.
Pay attention to light sources: Understand the direction and intensity of light in your sketch. Layer shadows accordingly to create a realistic play of light and shadow.
Experiment with opacity: Adjust the opacity of each layer to control the intensity of the shadow. This allows for a more nuanced and realistic representation of shadows.
Depth Through Layering
Enhance your digital sketches by employing layering techniques to create depth and intricate shadows.
Layering is a powerful tool that can transform flat, two-dimensional drawings into vibrant and realistic images. When creating depth with shading, it is important to understand how light interacts with objects in the real world.
By strategically layering different shades and tones, you can achieve a 3D effect that adds dimension and realism to your artwork. Start by establishing a base layer with the lightest shade, then gradually build up darker shades to create shadows and contours.
Experiment with blending modes and opacity levels to refine your shadows and highlights. With practice, layering will become an essential technique in your digital sketching repertoire, allowing you to create captivating and lifelike illustrations.
Creating Dimension With Layers
By strategically layering different shades and tones, artists can effectively create dimension and shadows in their digital sketches. This technique allows for the creation of realistic highlights and adds depth and texture to the artwork.
Here are four key ways to achieve this:
Layering Shadows: Build up layers of darker shades to create shadows and add depth to objects or figures in the sketch. This technique helps to create a three-dimensional effect.
Gradual Blending: Gradually blend lighter and darker tones together to create smooth transitions and realistic highlights. This technique adds depth and dimension to the artwork.
Overlaying Textures: By overlaying various textures on different layers, artists can create a sense of depth and add visual interest to the sketch. Experiment with different textures to achieve the desired effect.
Highlighting Techniques: Use lighter shades and tones to create highlights on objects or figures, emphasizing their three-dimensional form and adding depth to the overall composition.
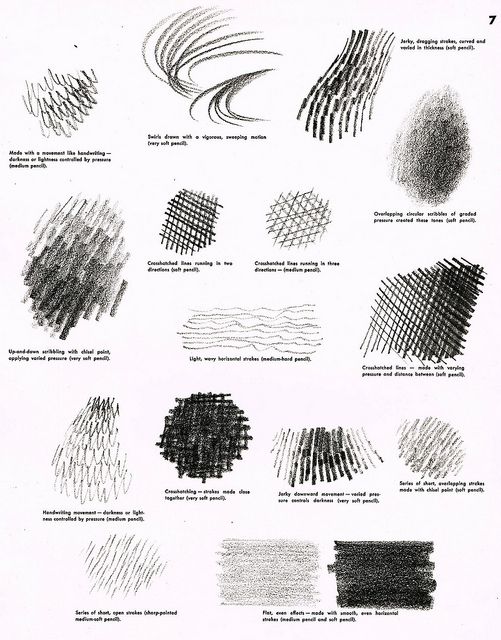
Adding Texture and Detail With Stylus Pressure
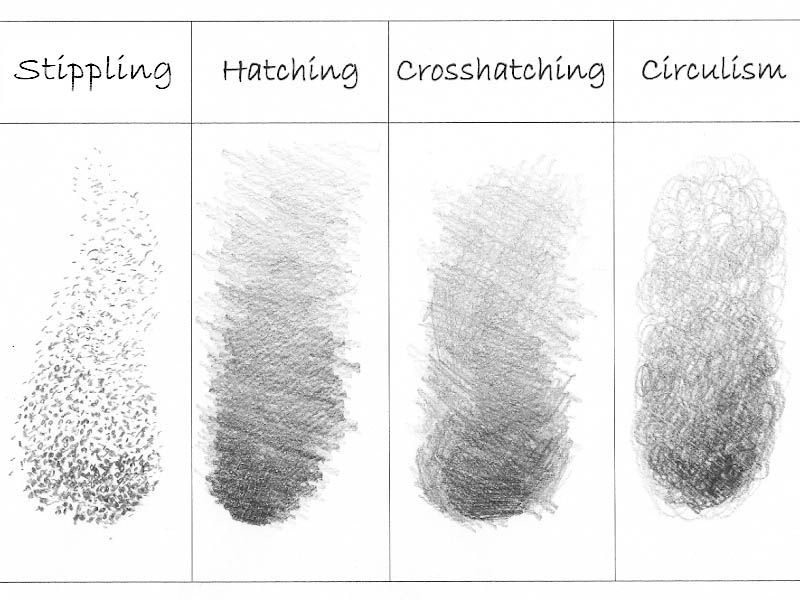
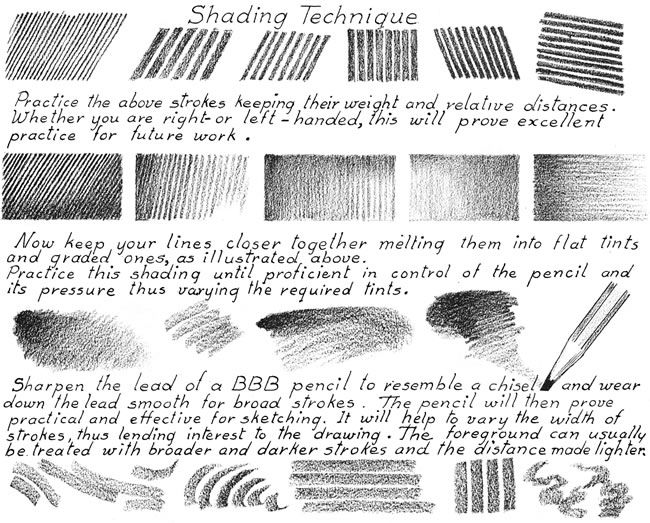
Utilize varying levels of stylus pressure to intricately incorporate texture and detail into your digital sketches on the iPad. Adding texture and detail with stylus pressure is a technique that allows artists to bring their drawings to life by mimicking the effects of traditional drawing tools.
By varying the pressure applied to the stylus, artists can create different textures and shading effects, adding depth and realism to their sketches. Exploring different shading techniques, such as cross-hatching, stippling, or blending, can further enhance the level of detail in your digital artwork.
With the freedom that digital sketching on the iPad provides, artists can experiment and refine their techniques, ultimately achieving the desired texture and level of detail in their sketches.
Incorporating Color and Gradients
When incorporating color and gradients into your digital sketches on the iPad, it is essential to understand the impact they can have on the overall composition and visual appeal of your artwork. By incorporating color schemes and adding shading effects, you can create depth, dimension, and mood to your sketches.
Here are four techniques to help you master the art of incorporating color and gradients:
Color schemes: Experiment with different color combinations to create harmony or contrast in your sketches. Consider using complementary colors or analogous colors for a visually pleasing effect.
Gradient tools: Utilize the gradient tools available on your iPad sketching app to add smooth transitions between colors. This can help create realistic lighting and shading effects.
Layering colors: Build up layers of colors to add depth and richness to your sketches. Start with a base color and gradually add lighter and darker tones to create volume and dimension.
Blending modes: Explore different blending modes in your sketching app to achieve unique color effects. Overlay, Multiply, and Screen are just a few blending modes that can enhance your artwork by adding texture and depth.
With these techniques, you can bring your digital sketches to life and create captivating visuals on your iPad.
Exporting and Sharing Your Artwork
When it comes to exporting and sharing your artwork created on the iPad, there are various options to consider.
One of the most common methods is sharing your artwork on social media platforms, allowing you to showcase your talent to a wider audience.
Additionally, utilizing cloud storage options enables you to safely store and access your artwork from multiple devices.
Lastly, collaborative art projects provide an opportunity to collaborate with other artists and create unique pieces together.

Share your artwork effortlessly across various social media platforms to showcase your talent and connect with a wider audience. Social media has revolutionized the way artists can share their creations, allowing for instant exposure and interaction with fans and fellow artists.
Here are four key ways to maximize the impact of your social media sharing:
Choose the right platforms: Determine which social media platforms align with your target audience and artistic style. Instagram and Pinterest are popular choices for visual artists, while Twitter and Facebook can provide a broader reach.
Optimize your posts: Use high-quality images or videos of your artwork, craft engaging captions, and utilize relevant hashtags to increase visibility and engagement.
Engage with your audience: Respond to comments, participate in discussions, and collaborate with other artists in digital art communities to foster connections and expand your reach.
Utilize scheduling tools: Plan and schedule your social media posts in advance using tools like Hootsuite or Buffer to maintain a consistent presence and save time.
Cloud Storage Options
One of the most convenient and efficient ways to export and share your artwork is by utilizing cloud storage options. Cloud storage allows you to store your artwork files securely on remote servers, accessible from any device with an internet connection. This eliminates the need for physical storage devices and provides the freedom to access and share your artwork from anywhere.
When it comes to data security, cloud storage providers prioritize the protection of your files. They employ advanced encryption techniques to ensure that your artwork remains safe from unauthorized access. Additionally, cloud storage options offer features such as two-factor authentication and secure sharing links, further enhancing the security of your artwork.
File organization is another key benefit of cloud storage. Most cloud storage services provide intuitive interfaces where you can create folders, categorize your artwork, and easily search for specific files. This helps you keep your artwork organized and easily accessible whenever you need it.
Collaborative Art Projects
To maximize the potential of collaborative art projects, it is essential to utilize effective methods for exporting and sharing your artwork with other artists. Here are four collaboration techniques to help you seamlessly share your creations and contribute to virtual art galleries:
Cloud Storage and Sharing: Use cloud storage platforms like Dropbox or Google Drive to upload and share your artwork files with collaborators. This allows for easy access and simultaneous editing.
Collaboration Apps: Explore apps specifically designed for collaborative art projects, such as Procreate Pocket, Concepts, or Adobe Fresco. These apps provide features like real-time editing and commenting, making it easier to work together.
Online Art Communities: Join online art communities like Behance or DeviantArt, where artists can share their work and collaborate on projects. These platforms often have dedicated spaces for collaboration and feedback.
Virtual Art Galleries: Showcase your collaborative artwork in virtual art galleries like Artsteps or Kunstmatrix. These platforms allow you to create immersive exhibitions, inviting viewers to experience your art in a digital space.
Frequently Asked Questions
What Are Some Common Mistakes to Avoid When Sketching on Ipad?
When sketching on iPad, it is important to avoid common mistakes such as overworking the sketch and ignoring basic principles of composition. By being mindful of these errors, artists can achieve a more successful and visually appealing outcome.
Can I Use a Regular Stylus or Do I Need a Special One for Sketching on Ipad?
When sketching on an iPad, it is recommended to use a special stylus designed for this purpose. While a regular stylus may work to some extent, a special stylus offers more precision and control, enhancing the overall drawing experience.
How Do I Prevent My Ipad From Running Out of Storage When Saving Artwork?
To prevent storage issues when saving artwork on iPad, it is important to manage the device's storage effectively. This can be done by regularly deleting unnecessary files, using cloud storage options, and optimizing settings for storage management.
Are There Any Specific Settings or Preferences I Should Adjust for Optimal Sketching on Ipad?
To optimize your sketching experience on the iPad, it is essential to adjust specific settings and preferences. By fine-tuning settings such as pressure sensitivity and palm rejection, you can enhance precision and freedom while sketching on the iPad.
Yes, it is possible to import custom brushes or tools into a sketching app. However, the compatibility of the app with custom brush imports may vary, so it is important to check the app's specifications and guidelines beforehand.
 Writing TipsCreative WritingJournalingSketching TechniquesBuying GuidesPrivacy PolicyTerms And Conditions
